"Rubbermaid" Bee Vacuum
During the summer of 2005, I got a call about someone who had a large hive of honeybees in the soffit of a house. I first attempted to remove the comb by hand, but after spending about 6 hours, getting stung more times than I could count and running out of daylight, I decided something else was needed.
I got online and downloaded plans for a "beevac" from beesource.com. Matthew Westall is the author of the plans. He suggests making the vacuum out of wood, but my wife, who is a self-proclaimed Rubbermaid enthusiast suggested I use clear Rubbermaid containers so I could see the bees inside. The resulting BeeVac is based on Matthew Westall's originals plans. It worked great and was worth every penny.
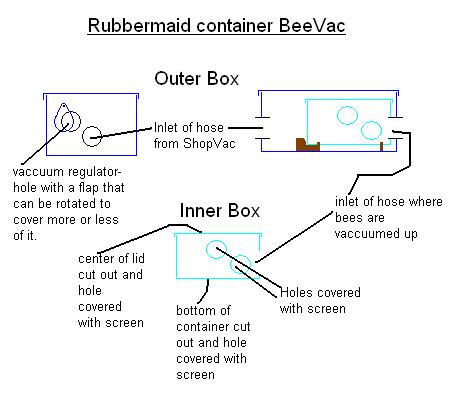
The design is a "box in a box". The outer box is connected to a ShopVac, which creates a vacuum inside the box. The inner box has several "panels" with openings covered with screen. There is a tube "fitting" that extends from inside the inner box, through a hole in the outer box and is connected to a ShopVac- type hose that actually vacuums up the bees.
The bees are vacuumed through the hose and into the inner box. Once inside the inner box, they are trapped because all the holes are covered with screen except the hole they entered by and there is enough vacuum at that hole that they cannot escape that direction. There is enough opened (and screened) surface area on the inner box and the vacuum force is spread out enough that bees can climb around on each other and do not get sucked up against the screens.
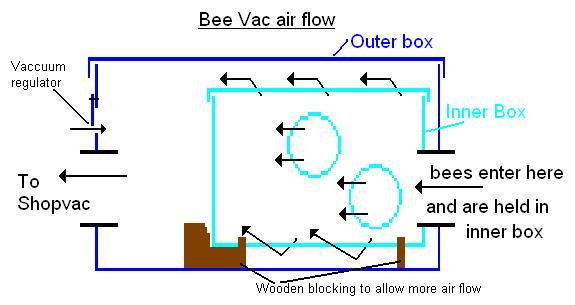
The key to keeping the bees healthy is to regulate the vacuum. If it is too high, they will be sucked into the inner box too hard and they will be injured. If the vacuum is too weak, they won't be sucked into the hose and will be able to crawl back out they way they went in. I added a vacuum regulator on the end of the outer box, close to the ShopVac end. I cut a round hole and then fastened a flap of material that can be rotated to cover more or less of the hole. If I notice that the bees are not being sucked into the hose, I open the flap a little. If they seem to be hitting the inside of the inner box too hard, I close the flap a little more.

Inner Box |
Outer Box |
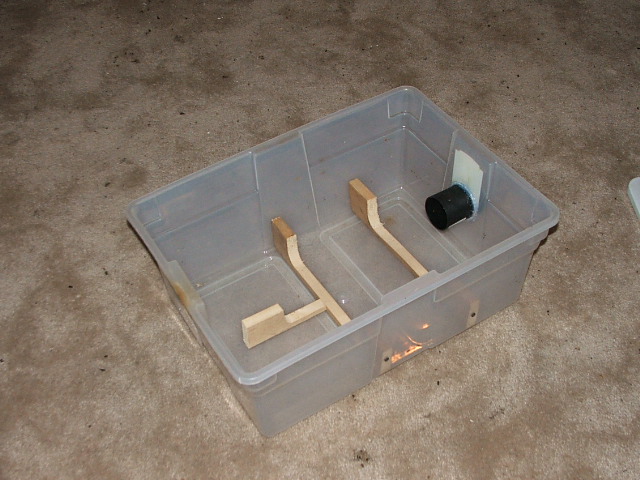
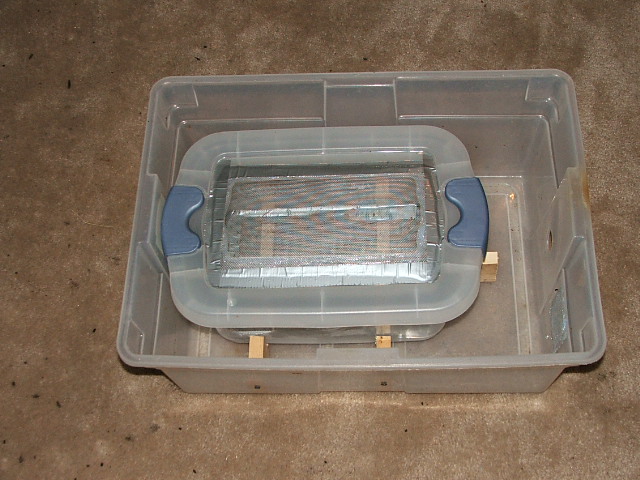 Both Boxes, with outer lid off |
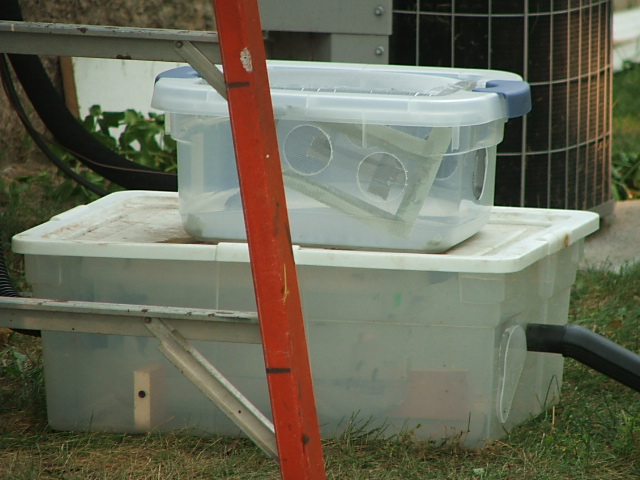 Vacuum in use (spare inner box on top) |
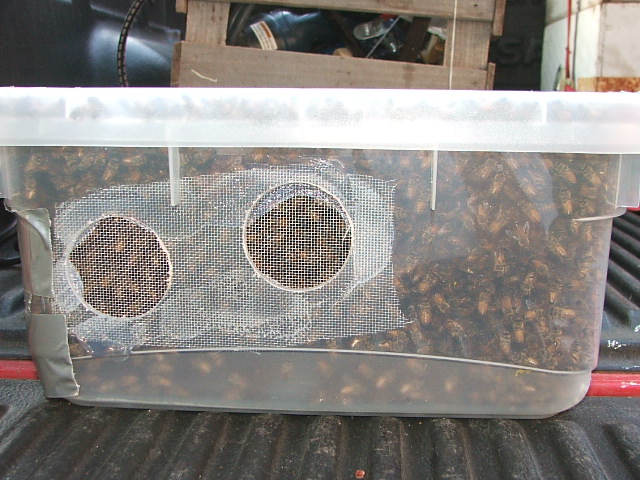 Inner Box, full of bees and ready to move to new home |
I like this design because I can view the bees the whole time. The container boxes are lighter than wood, too and don't require as much work to build. I made two inner boxes, so when one looks fairly full of bees, I can remove it, cover the open end with screen, insert the next inner box and capture more bees! Bees are remarkably docile after being vacuumed.
I vacuumed the bees off one or two pieces of comb, then removed those pieces of comb and tied them into frames, which then were placed into deep super boxes. I repeated until there were basically no bees crawling in the old hive. I estimate I left less than 10 bees! To release the bees in their new hive, I put an empty deep super on top of the deep supers containing their own comb, placed the inner box of bees on top of the frames, opened the inner box lid, and placed the telescoping cover over top. This way, the bees had to pass through all of their own comb before they could leave the hive. The bees accepted their new home and even the queen had been safely moved!
The only problem with any BeeVac is the need for electricity in order to run the vacuum.