The following section shows a little how the hive works and how it is taken apart for working with the bees:


Jason's Observation Hive
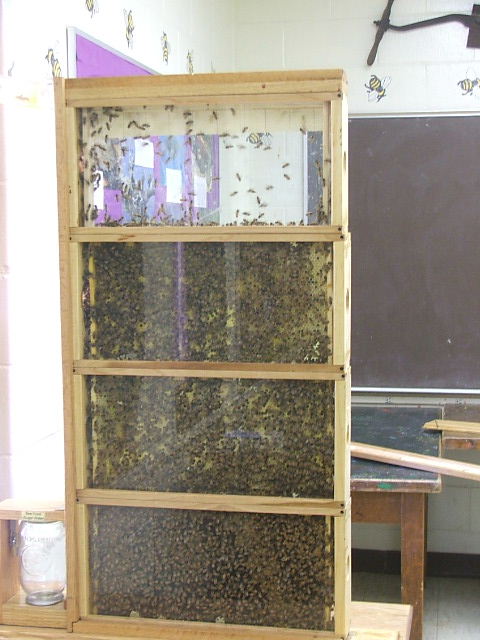
After a year of working with an observation hive that couldn't be maintained, I decided to build my own hive that would allow me to take apart modularly. I based the design on one I had seen that Paul Wikerd, a Pennsylvania beekeeper friend had built.
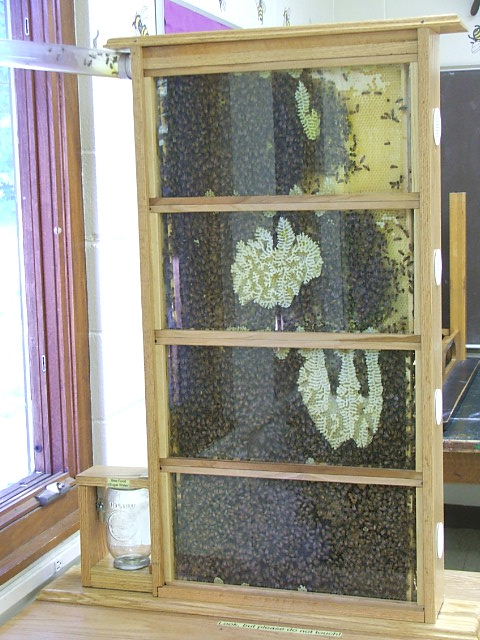
The hive has four-deep frames, each frame is in a separate module which allows me to remove one frame or more than one frame at a time, without the bees escaping into the room. This allows me to remove brood when the hive gets too full, remove burr comb that is built on the glass, and also to add supplemental frames of honey in the winter.
|
|
|
|
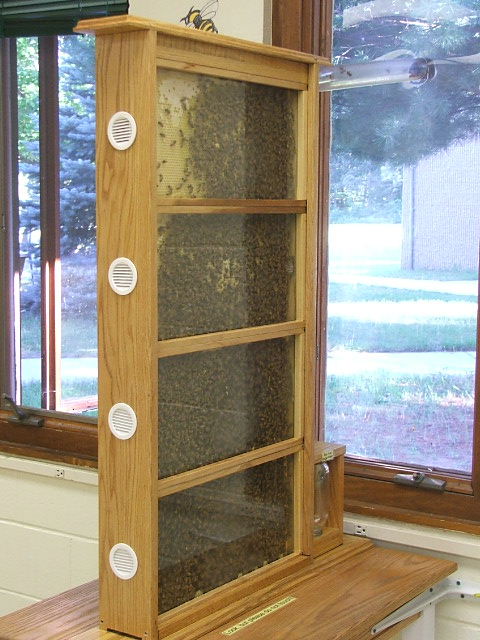
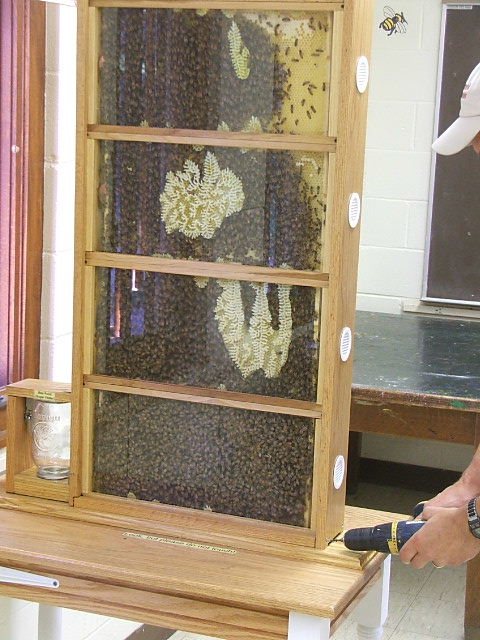
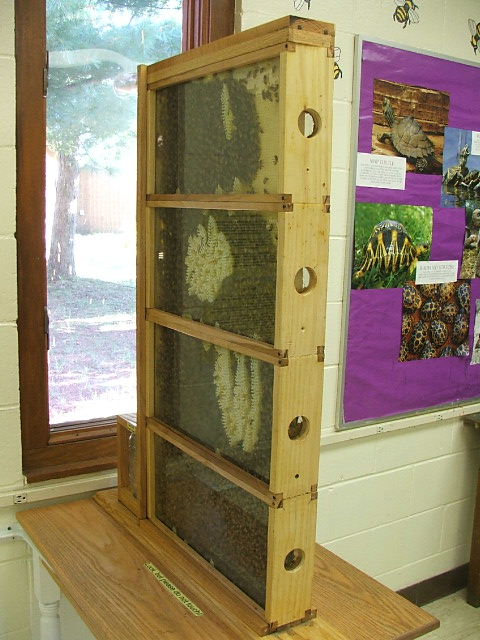
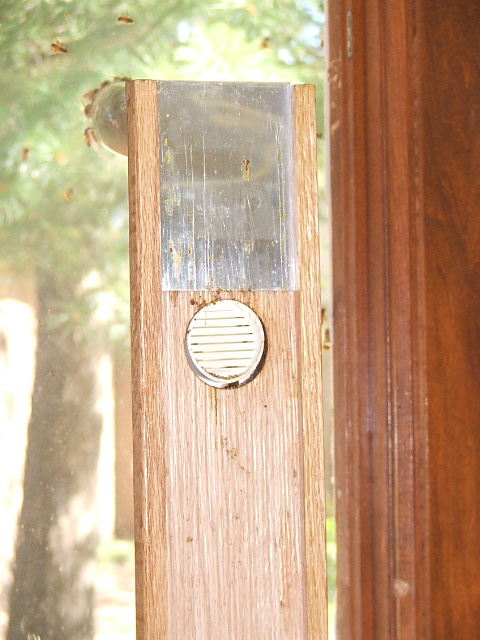
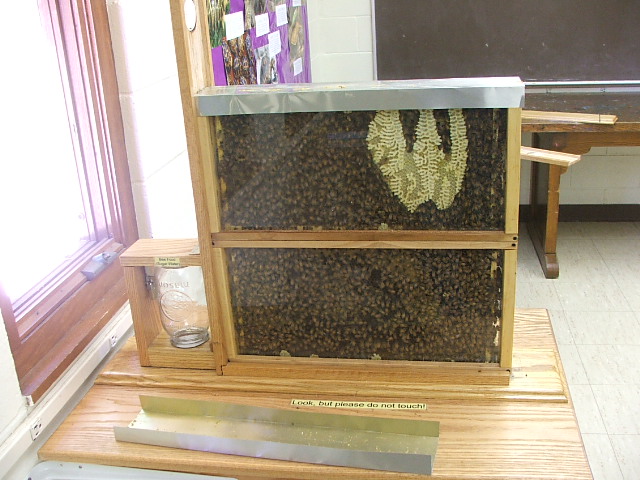
| The hive is built out of red oak. The
white circles on the back of the hive are plastic air vents. There are
also four of them on the front (towards the window). the building's
window was replaced with Plexiglas and a hole cut through it allowing the
clear PVC tube entrance tube to pass through. The entrance is just
above the top frame of bees. There is a groove cut in
the board at the base, which allows the bees to pass to the feeder area.
The whole hive is bolted to the table, and the table is fastened to the wall
to prevent it from tipping. The following section shows a little how the hive works and how it is taken apart for working with the bees: |
||
|
|
|
|
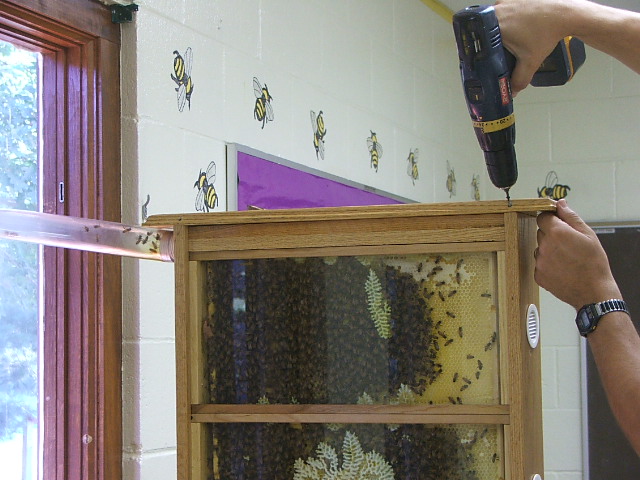
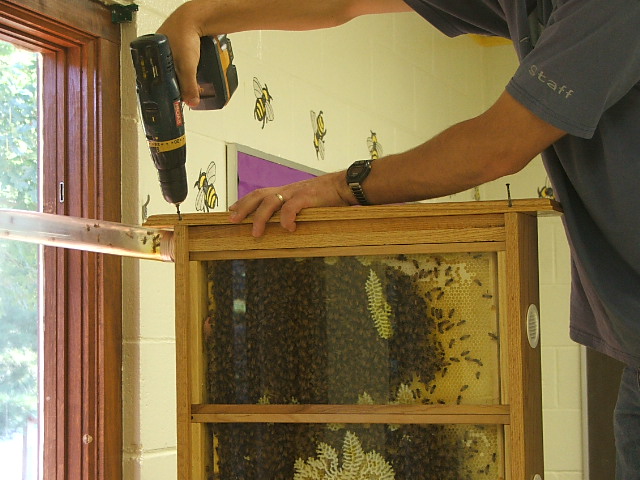
| First, the the top (outer cover) must be removed. It is screwed on using four square-headed finish screws. The top just sits above the hive's inner cover. | ||
|
|
|
|
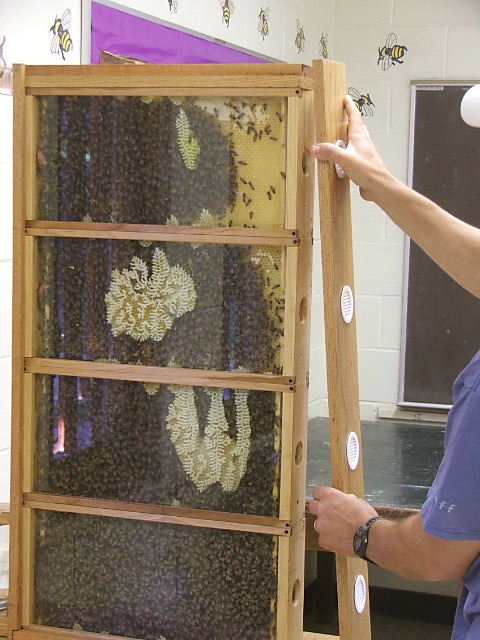
| Next, the back (away from the window) must come off. The back is held in place with two square head finish screws at the bottom and the screws that hold the top (outer cover) on also hold the back on. The individual frame modules fit into a groove that I dadoed into each the back and the front (towards the window). Also, each module has a hole drilled into the end which lines up with the plastic vents on the front and back. The modules then have a piece of screen stapled over each vent hole. Each module is open at the top and the bottom to allow the bees to travel between the different frames. The top frame has an inner cover over it, which keeps the bees from escaping out of the top and also allows access to the entrance tube. | ||
|
|
|
|
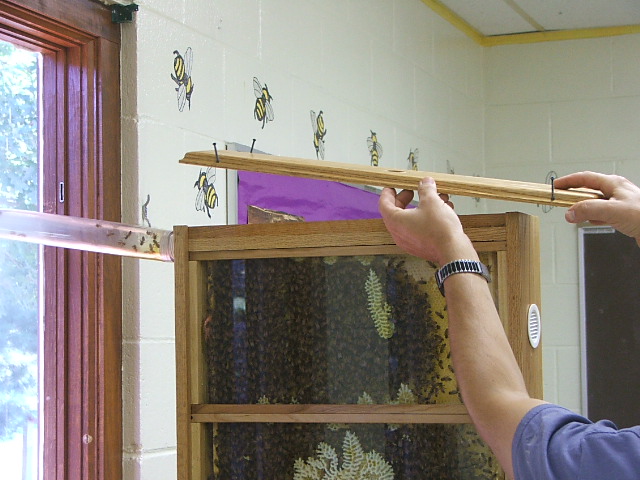
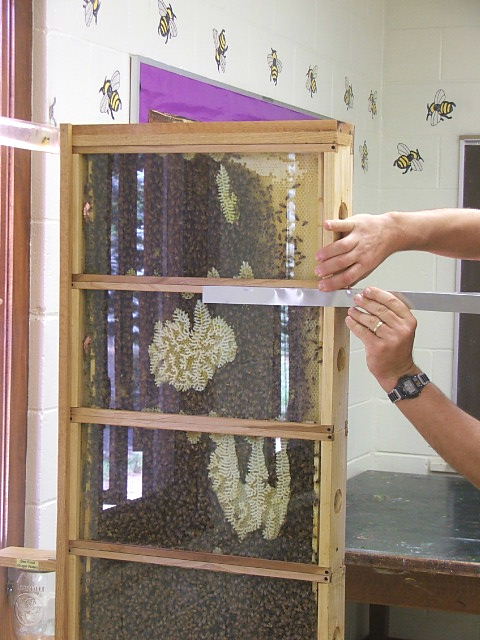
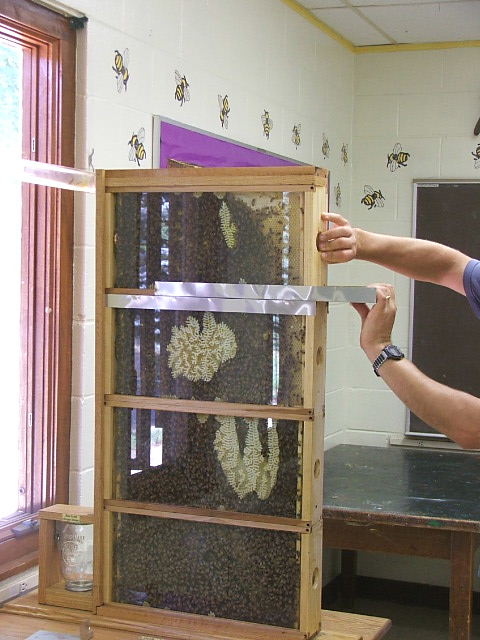
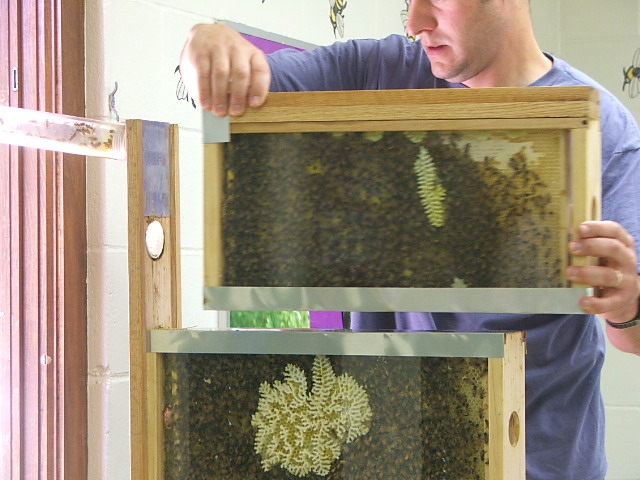
| Then I slide a U-shaped piece of aluminum flashing into the crack between the top and the 2nd modules (above left). This separates the top of the hive (and the entrance) from the rest of the hive. In this picture, I put the first flashing in with the "U" facing down, but it doesn't matter which one is inserted first. After the first piece of flashing is inserted, I insert a second piece above it (with the "U" facing up)(above middle). The flashing is held in place with just the force of the bend in the flashing squeezing the module. the top piece of flashing prevents the bees from moving down out of the top module and the bottom piece prevents the bees from moving up out of the rest of the hive. Another piece of flashing bent to fit into the dadoed groove in the front (toward the window) is inserted between the front and the top module (above right) and is held to the front. A piece of flashing is also bent to cover up the entrance hole in the inner cover on top of the top module (not shown) to prevent the bees from escaping while the module is removed. | ||
|
|
|
|
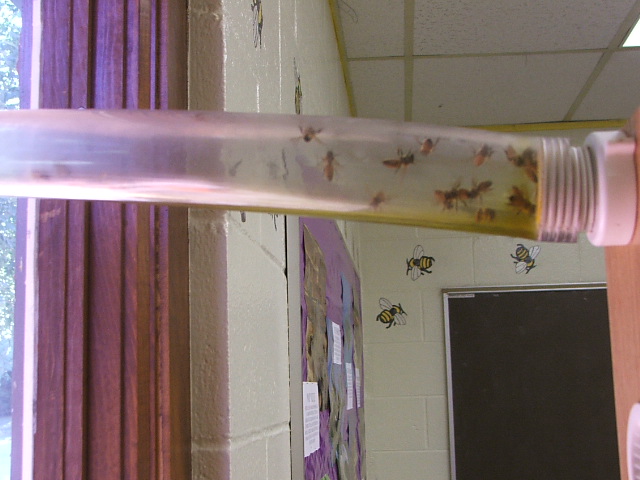
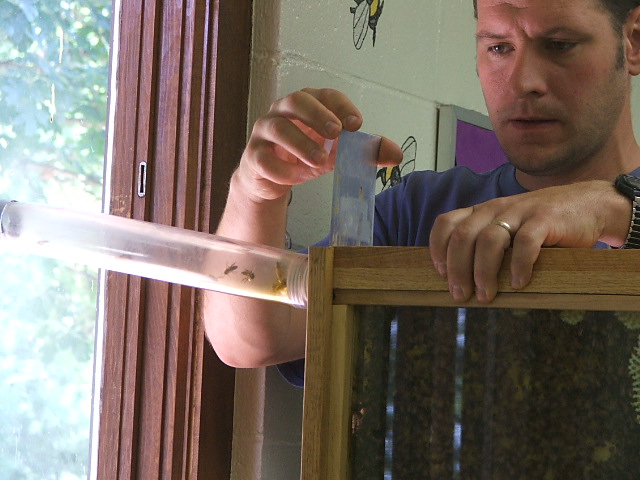
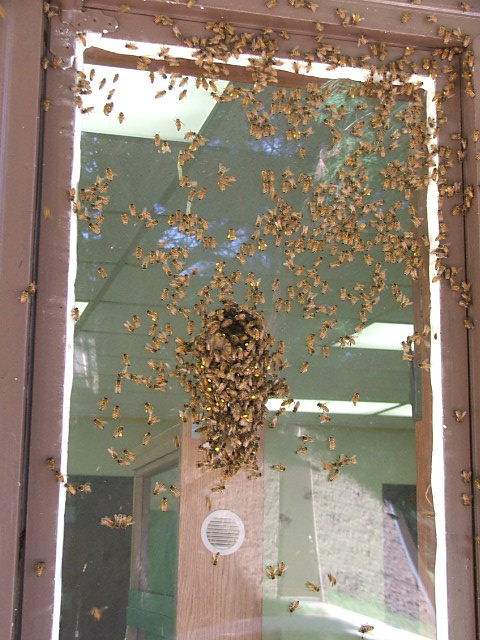
| At this point, the bees are entirely contained in the hive. The top module can be carefully removed (left). The center picture (above) shows the inside of the front (toward the window) with the flashing piece covering the entrance. Since many bees were out foraging at the time the entrance was covered, they tend to fill the tube waiting to come back in (right). the dado in the front piece can also be seen here. | ||
|
|
|
|
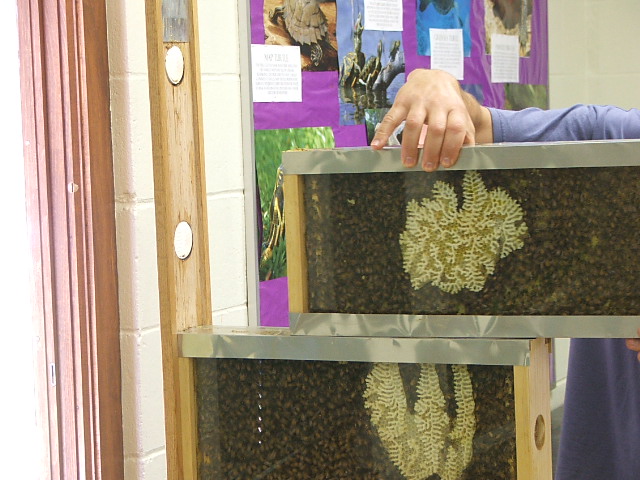
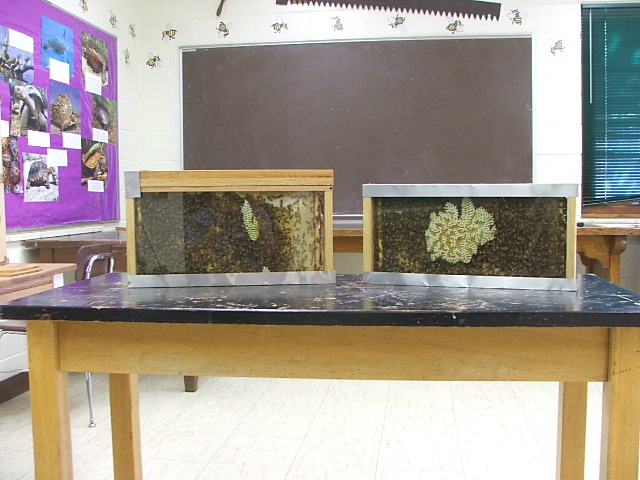
| Flashing pieces are then inserted between the second from the top and third frames and the send frame can be removed (left). Right hand picture shows the top two frames in the room with no bees flying around! | ||
|
|
|
|
| Above pictures show the bottom two frames in place with the top frames removed. The middle picture also shows one of the flashing divider pieces upside down on the table. Meanwhile, the foraging bees have filled the tube and are clustered outside on the entrance (right). | ||
| I have enough flashing to allow me to remove the top three frame modules at one time. I then suit up and take the modules outside the window to work them. I usually remove the flashing divider, then remove the frame, then scrape the glass with a hive tool to remove burr comb. While they are outside, I can take the flashing divider back inside to remove the bottom module. During removal of the bottom frame, it is possible for a small number of bees to escape, since some may be in the area of the sugar syrup feeder, which I have not found a way to close off yet. | ||
| I put the hive back together in the opposite order. The only difference is that I often stack two modules together outside and bring them in as a pair with the flashing dividers covering the top opening and bottom opening. The modules can also be removed two at a time, but they tend to get heavy very quickly! | ||
|
|
|
|
| By the time the entrance is once again opened, the bees have already clustered all over the window (left). The hive is back together (right) except the back and the top (outer cover) need to be screwed back on. | ||
| I am experimenting with the top frame. I modified a frame by angling the top bar. I then put a 1" strip of foundation in. The idea is that the bees will start drawing out the comb at the top and will continue without foundation. This encourages the bees to draw out natural size cells, rather than the size specified by the foundation. So far, they aren't drawing much of it out, but the jury is still out. | ||